|
Cake BoardsWhen you have a Celebration Cake to make, take your time first to draw a few sketches, and consider the overall appearance of the cake when it is finished - from main flowers, filler flowers, ribbon loops, embroidery, lace and other features - to the board presentation that your cake will sit upon. Overall, you want your cake to be visually appealing and balanced - so when attending to the Cake Board, you need to consider size, shape, covering and colouring. Try to avoid using wide boards, as not only does this look out of proportion (dwarfing your cake), but it also tends to make a single tier cake look a little like a top hat. The board has to be functional, so make them wide enough and thick enough to fully support your completed cake without bowing (and cracking your icing). I tend to go for masonite or plywood that is at least 6mm thick. I personally tend to stay well away from loud patterns on the boards (whether paper or fabric) as this tends to draw attention away from my masterpiece itself.
Covering With Paper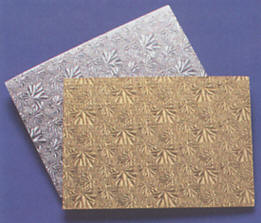
If you have chosen to cover your Cake Board with paper, which is the most usual choice, the following is my method for ensuring the board is beautifully covered to properly show off your cake decorating skills. Using spray on adhesive, spray the back of the paper you wish to use - and then simply place your board on the paper, pressing down to adhere the paper to the surface of the board. Flip the board and paper over, and using a damp cloth, smooth out any wrinkles working from the centre of the board towards the edge. Turn the board and paper over again. Cut the paper approximately 1.5" from the edge of the board. Then, with your scissors pointed directly towards the edge of the board, work around the board making snips every centimetre or two. When you have done this, use your spray adhesive on the edge of the board, and the first centimetre under the board. Working quickly around the board, turn up every second slit of paper, and then turn up the remaining tags - being sure to press it all down securely with your damp cloth when you are finished. I then take the backing off a piece of white adhesive contact and lay it face down on the table. Take your Cake Board, and gently place it base down on the Contact. Take a scalpel, and working slowly - cut the Contact close to the size of the board. Turn the Cake Board over to reveal the white Contact, and using your damp cloth, smooth out any air bubbles or wrinkles. At this stage, I usually place four cleats (rubbers squares used as door stops) evenly on the base to lift the board off the table, and provide a way to get your fingers under the board.
Covering With Fabric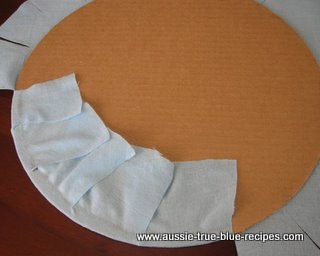
If you choose to cover your Cake Board with fabric, proceed in exactly the same way as for paper - using a spray adhesive. When you have covered the board with the fabric, I strongly advise recovering with clear adhesive Contact, taking care to go beyond the fabric at the back of the board. I then cover the base with the White Adhesive Contact and affix the cleats as with the Paper version.
Covering With Plastic Icing (Fondant or Pettinice)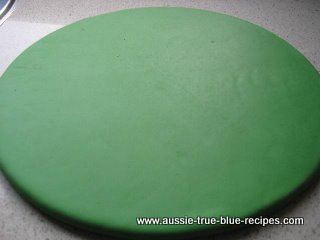
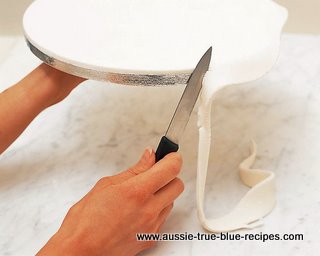
One of the quickest and most professional board finishes is plastic icing (also referred to as either Petinice or Fondant) - the same icing you will eventually use to place a cover on the cake itself. Make sure it is the same colour as the icing you will use on the cake. In fact, to make sure it is exactly the right colour - it would be prudent to colour all of the icing at once, then simply take some to use for the board, covering the remainder in airtight plastic to reserve for when you cover the cake. Sprinkle some sifted pure icing sugar on your work surface, and rub some copha (a sweet lard) between your fingers to assist with the kneading process. Plastic icing can be quite stiff and firm in the beginning, and it is important to knead it over and over until it becomes quite soft and pliable. Once you have it to this stage, dust your work surface with a little more icing sugar and simply roll it out to the required thickness, turning it after every roll of the rolling pin. I recommend that for icing boards using this method, you roll it to about 3mm thickness. Spray your board with a thin coating of water, and quickly lift the icing onto the board. The water will assist the icing to adhere to the board, but will also assist you to work it a little to get it perfect. Lift the icing until it lays flat on the board with no bubbles, and then using a sharp knife, cut around the edge of the board until the icing and the edge of the board are flush.
Once the icing is looking beautiful and smooth, I then rub over the icing itself with a piece of satin, ensuring I keep my hand flat so as not to dent the icing through the cloth. This will remove any excess icing sugar and will produce a lovely high shine on the icing. It will soon become obvious that the thick edge of the board is still visible - and it is at this stage that you can adhere (with pvc glue) a ribbon or paper tape to accentuate the colours you will be using in your cake. Make sure that whatever you use, it is the same width as the edge of the board and icing itself.
Flooding The Board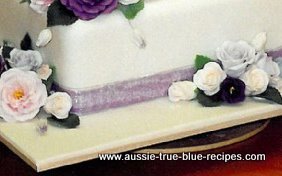
My very favourite method of covering a cake board is by "flooding" it. In short, this means to cover it with royal icing . Make up a fresh batch of royal icing using my recipe, however, for this project we need to adjust the consistency twice. First, by adding additional icing sugar until the royal icing is quite thick and pasty, and then by adding a drop of water at a time, until the icing streams just a little thinner than honey and will will easily sink back to a smooth surface when you stop stirring. Stir the icing with a knife or metal spatula rather than a spoon, and try to avoid creating air bubbles. In order to flood the board and obtain the very best result, I recommend setting the cake on the board prior to flooding - as you want to flood the board from the edge of the cake to the edge of the board and obtain a seamless appearance. Place your cake and board on a turntable. Place a plastic bag in a tall mug or glass (corner towards the base) and pour your royal icing into the bag. Tie the bag off with a knot or a rubber band. Snip the corner off the bag (just a medium hole), and "pipe" the icing on to the board. Start around the base of the cake, and continue going round and round as you work your way out to the edges. Work quickly so that your icing does not begin to dry before you get to the second "round". Once you have flooded the board, use a straight knife or metal spatula to smooth it all over and ensure it is even. If bubbles appear, chop them with the knife to burst them. Drop the board gently on the turntable to level out your icing. You will need to give the board at least 24 hours to dry completely, but it may take a little longer depending on weather conditions. You will notice once the icing is completely dry, that you will need to attend to the edge of the board with a length of paper tape or ribbon, as with the fondant covered board outlined above.
Flooding The Board - Video Demonstration
|
 Using your smoothing tool, and commencing in the middle, rub the icing firmly in a circular motion. You will notice that this further thins the icing, and that you will need to retrim the edges.
