|
Tools of the Cake Decorating TradeWhen you first start any new craft, there is a short period of complete and utter confusion while you grapple with terms and instructions you've never heard before. Hopefully, between my Video Demonstration (immediately below) and this page, most of that confusion will be lessened. Make sure you SUBSCRIBE to my Cake Decorating You Tube Channel - so that you never miss an upload.
Must Have Tools: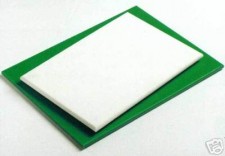
A rolling board - these typically measure roughly 10" x 8", though they are able to be purchased in larger sizes. This piece of equipment is imperative, as it should be specifically used only for moulding paste, and creating your works of art. Being of acrylic, it is non-stick and very durable - allowing you to roll your moulding paste very thinly.
A piece of soft dense foam - this can be obtained from the rubber shop (Clark Rubber?) or anywhere that sells foam blocks for chairs, or underlays for sleeping bags. It need only be about the same size as your rolling board - it is used to support your flowers as you mould them with your ball tools.
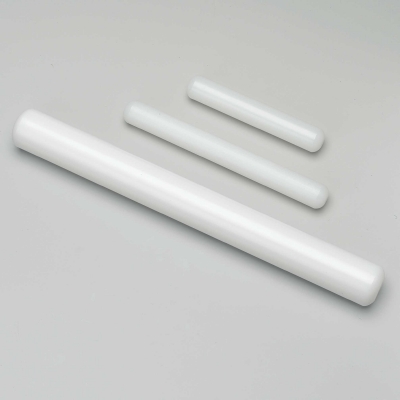
Roller - this is a moulding paste specific tool and used for rolling your moulding paste very thinly. It is acrylic, and therefore durable and non-stick.
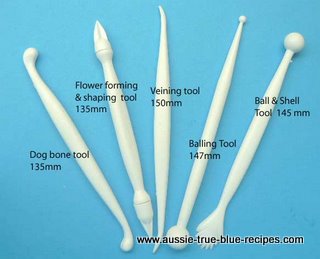
Ball Tools - these are commercially available as a set, and are relatively inexpensive to purchase either online or from a retail shop. Bear in mind though, that my favourite "tools" are just items from around the house. I commonly use rounded toothpicks for fluting and thinning, and as I love working the smaller filler flowers, I require some very small ball tools. Therefore, I have used such things as pin heads and hair pins to name a few.
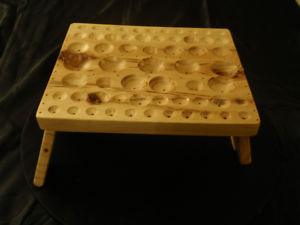
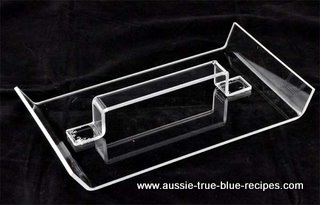
Holed Board - I have always had a handy man make me a holed board out of timber (as pictured, however these are commercially available also, and consist of a piece of acrylic on legs, with a series of different sized holes. These are great to drop your completed flowers into to allow them to dry thoroughly. Just make sure, if you're making your own, to drill a hole, and then have someone handy route a shallow impression for your flower to sit in.
In addition, I have used patty cake tins, empty chocolate boxes (the plastic bit that inserts into the box itself), an empty egg carton - and so on. Sometimes, I have even been known to "prop up" individual rose petals with small balls of cotton wool, until the flower has dried completely. A piece of hard plastic - such as the packaging from a shirt box. This is used to cover your rolled moulding paste to prevent it from drying out until you need it.
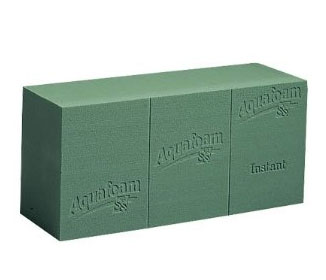
Florist's Foam or Oasis - I'm sure you will recognize this foam as the type florists commonly use in their arrangements. This is ideal for cake decorating, as the flowers can be quite easily poked into this substance to continue the drying process. One thing I will recommend though - as Oasis foam can be quite crumbly, I covered mine in cling wrap first.
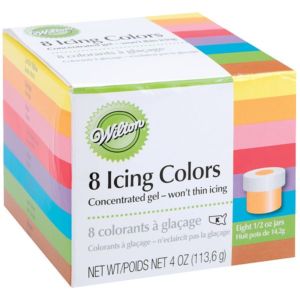
Wilton Concentrated Gel Colours - These really are the best product to use for colouring your icings and moulding pastes - as it doesn't affect the consistency of your icing, though changes the colour evenly throughout. These colours don't leave your icings looking grainy as other liquid colours often do. Beware - you really don't need to use great quantities of this product - I use just the smallest blob on the end of a toothpick to change quite a large volume of plastic icing. Suffice to say that I have only ever had to purchase my jars once, as they seem to last forever. You can purchase the sets of colours in varying amounts (8, 12, 24) - or you can purchase the jars individually either online or through your nearest cake decorating supplier. I recommend purchasing the sets, as purchasing jar by jar is more expensive.
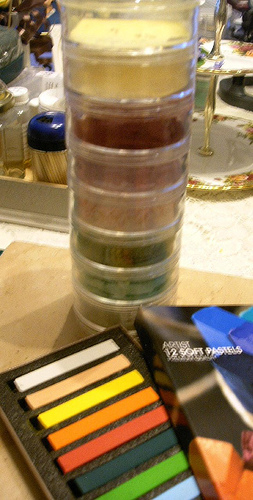
In order to make your own chalk colours, you need: A set of chalks (from an Art Store) A bag of Potato Flour (from Health Food Store) Stocking (unused pantyhose) Many small sealable containers A small craftwork scalpel (from an Art Store) Rubberbands Newspaper or Paper Towelling
Creating your chalk colours can be time consuming, so set aside half a day to create many dusts and chalks - you don't want to be stopping to create them one by one as you are needing them. To commence, lay some newspaper or paper towelling down on your work space (and I recommend sitting at a table to do this as it is a lengthy process if you are making many colours). Taking one chalk colour from your set, scrape along the long side to obtain a dust (about half a teaspoon). Stretch your stocking material tightly over your plastic container, and secure with a rubber band. Gradually sieve the dust through the stocking using the side edge of a teaspoon - don't try to force larger grains through the stocking (just discard these). Take a teaspoon of potato flour, and using the same method, add this to the plastic container. Continue this way, creating a variety of shades and colours - adding less or more potato flour to achieve the desired shades. Seal the containers tightly - and there you have it, ready made chalk dusts for use for all of your flowers and cake decorations. These will last you for many years, so it is worth taking the time to create many colours from the outset. You apply them to your flowers by using a very soft-hair art brush (small) - although for small filler flowers, I simply upend the flower and swirl it gently through the dust, blowing off the excess.
I have both a wooden smoother, and an acrylic smoother - and although the wooden one will do in a pinch, I definitely prefer to use the acrylic smoother. These are used to achieve a finished and smooth look on your fondant icing, once you have trimmed all excess away. Rubbing in a small circular motion, the smoother assists the inexperienced cake decorator to achieve a professional finish on the cake. As you gain more experience, you can either use a combination of the smoother and your hand/fingers - or just your hand/fingers. I like to use the smoother for the flat edges, and then I curl my fingers over the edge of the cake, effective using the underside of my middle knuckles to smooth the edge of the icing.
These can readily be purchased at any kitchenware shop or most cake decorating shops.
This powder is commonly used to make your fondant a little stiffer and quicker to dry - ideal for figurines and other moulded decorations. I also use it to make my
flower glue
which is how I create my beautiful flowers so realistically.
These are an essential part of cake decorating - though you won't necessarily use all of the tubes in a set. If you are anything like me, you become comfortable with a particular "style" and will rely on 2 or 3 tubes to complete your work - though I do have friends who use many tubes for different projects. You can either buy a complete set (less expensive in the long run), or you can purchase them singly from your cake decorating store. Make sure you also purchase the piping bag (buy two or three if you will be using different icings, or different colour icing, or different sized tubes on the same project).
This is used to lightly dust your board before rolling out your moulding paste, and prevents the moulding paste sticking to the board as you roll it out.
Back to Cake Decorating from Tools Of The Trade
|
 Chalk Colours - These are imperative for cake decorating, as they will enable you to create unlimited shades and colours.
 Smoothers can be purchased from most good cake decorating stores - and you will find the styles, shapes and material will vary slightly.
 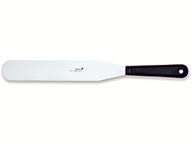 A metal spatula has become one of the tools I make the most use of. It is ideal for mixing batches of royal icing or buttercream, and spreading evenly on your celebration cake.
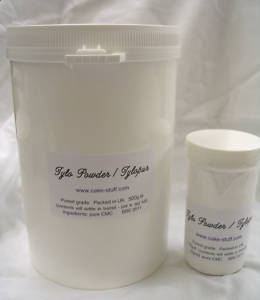 Tylophur is commonly referred to as Tylose and is basically the same powder product.
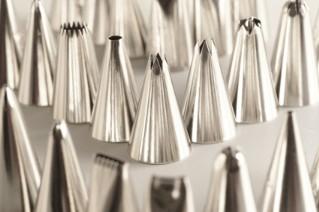 Piping Tubes are easily purchased from all cake decorating stores - both online and in your neighbourhood.
